Discord Developer Portal — full walkthrough
Step-by-step guide to creating a Discord application, getting a bot token, configuring intents, and inviting your bot to a server.
Updated
This is the part of shipping a Discord bot that trips up most people. Discord's dashboard has lots of toggles and the wrong combination means your bot deploys, connects, but silently ignores every message. This guide walks you through every click.
FlareX can't create a Discord application for you — Discord only allows the account owner to do it. Once you have a token you can reuse it for as long as you like (rotate if it leaks).
1. Create a Discord application
Head to the Discord Developer Portal and sign in with the Discord account that will own the bot. This is usually your personal account.
Click New Application in the top right. Give it a name — this is the name your users will see next to the bot everywhere (e.g. "Ticket Bot" or "MyServer Mod").

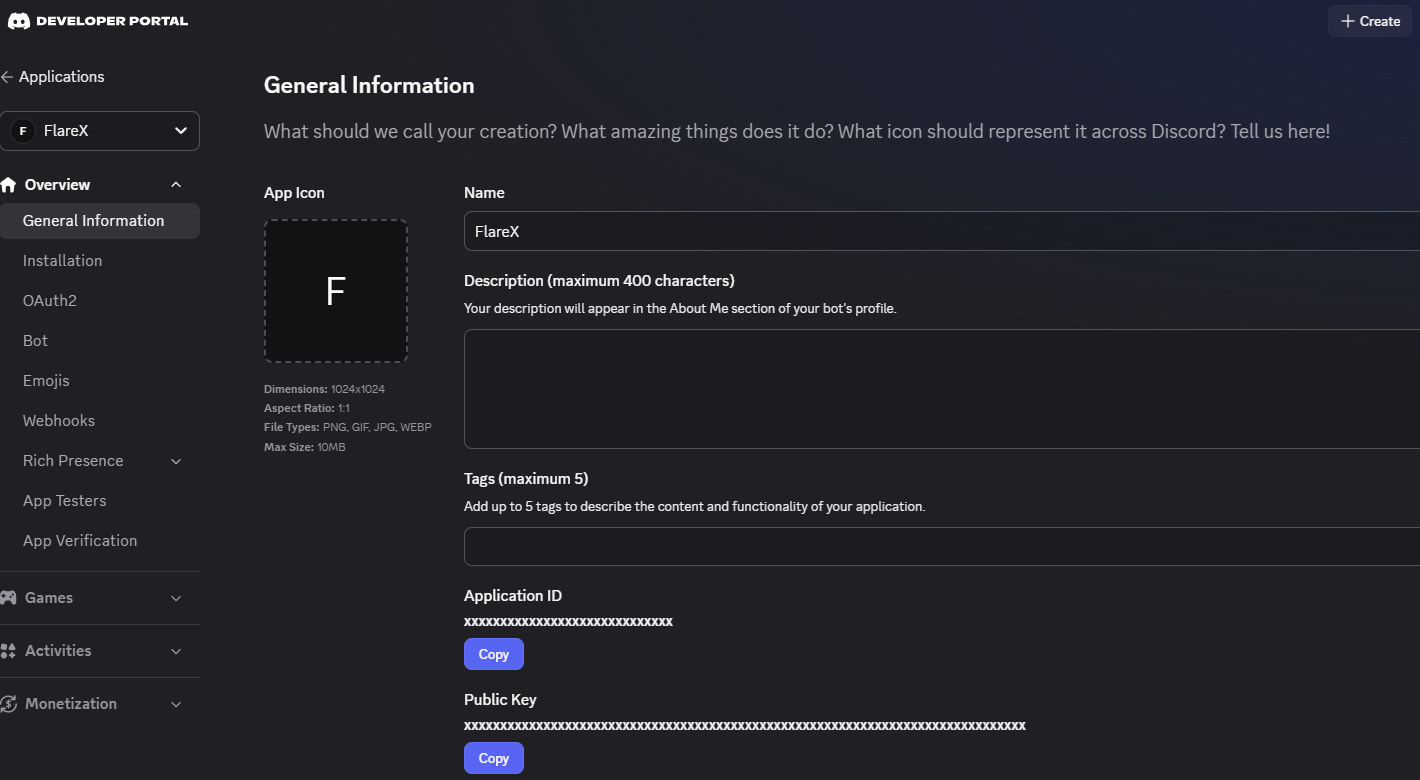
Accept the Developer Terms of Service when prompted. You land on the General Information page for your new application.
The application name can be edited later but the URL-safe ID can't change. Pick something recognisable.
2. Configure basic info
On General Information:
- Upload an app icon (PNG, 1024×1024 is ideal).
- Fill in a short description (optional but recommended — shows in the bot's profile in Discord).
- Leave Interactions Endpoint URL, Terms of Service URL, and Privacy Policy URL blank for now. You can add them later if needed.
Copy the Application ID — you'll reference it in bot invite URLs.
3. Create a bot user and grab the token
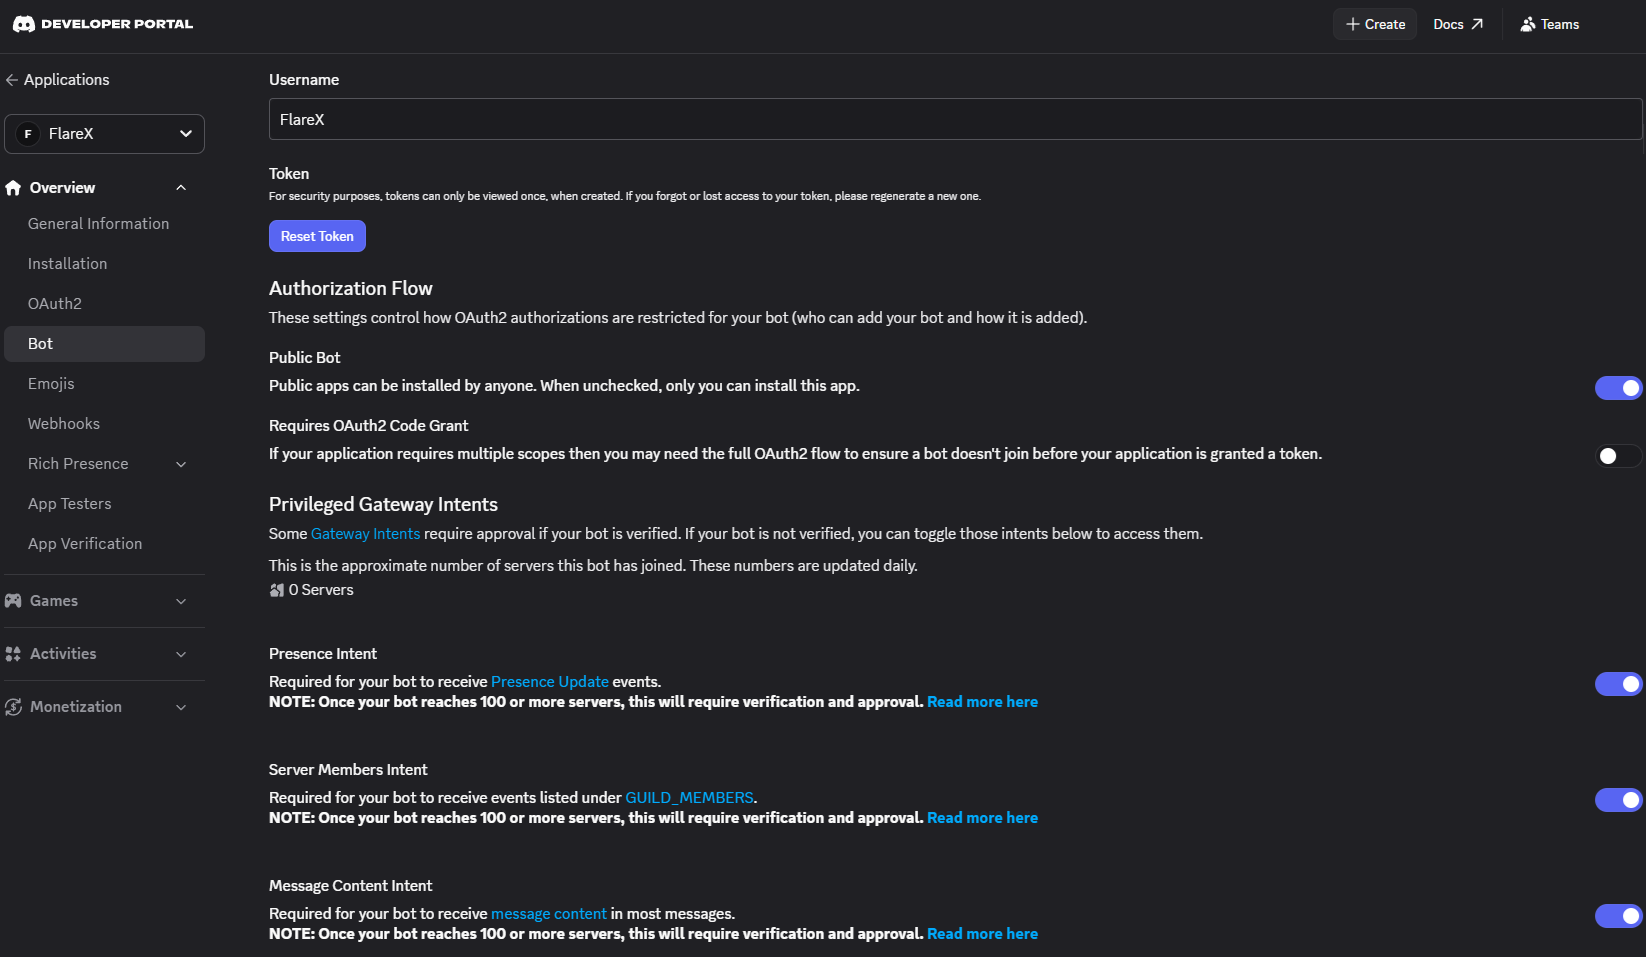
Click Bot in the left-hand sidebar.
Click Reset Token (or Add Bot on older applications) to create a new bot token. Discord will warn you — that's fine, click through.
Copy it immediately. You cannot view it again — only reset it. Paste it somewhere safe right now (a password manager is ideal).
This is the value you will paste into DISCORD_BOT_TOKEN in FlareX Secrets.
4. Gateway intents — the #1 source of "my bot won't respond"
Still on the Bot tab, scroll down to Privileged Gateway Intents. These toggles decide what Discord sends to your bot. Getting this wrong is the most common cause of a bot that deploys fine but doesn't react to anything.
| Intent | Enable when your bot needs to… |
|---|---|
| Presence Intent | Read member status (online, idle, DND). Rarely needed. |
| Server Members Intent | React to join/leave events, look up the full member list. |
| Message Content Intent | Read the text of non-mention messages (almost always yes). |
Enable MESSAGE CONTENT INTENT for most bots. Without it, message events arrive but the content field is empty — your bot sees every message as a blank string and thinks nothing was said.
Once a bot is in 100 or more servers, Discord requires verification before you can enable these intents. Keep this in mind if you're building something you expect to scale — apply for verification early.
5. Configure OAuth2 scopes and bot permissions
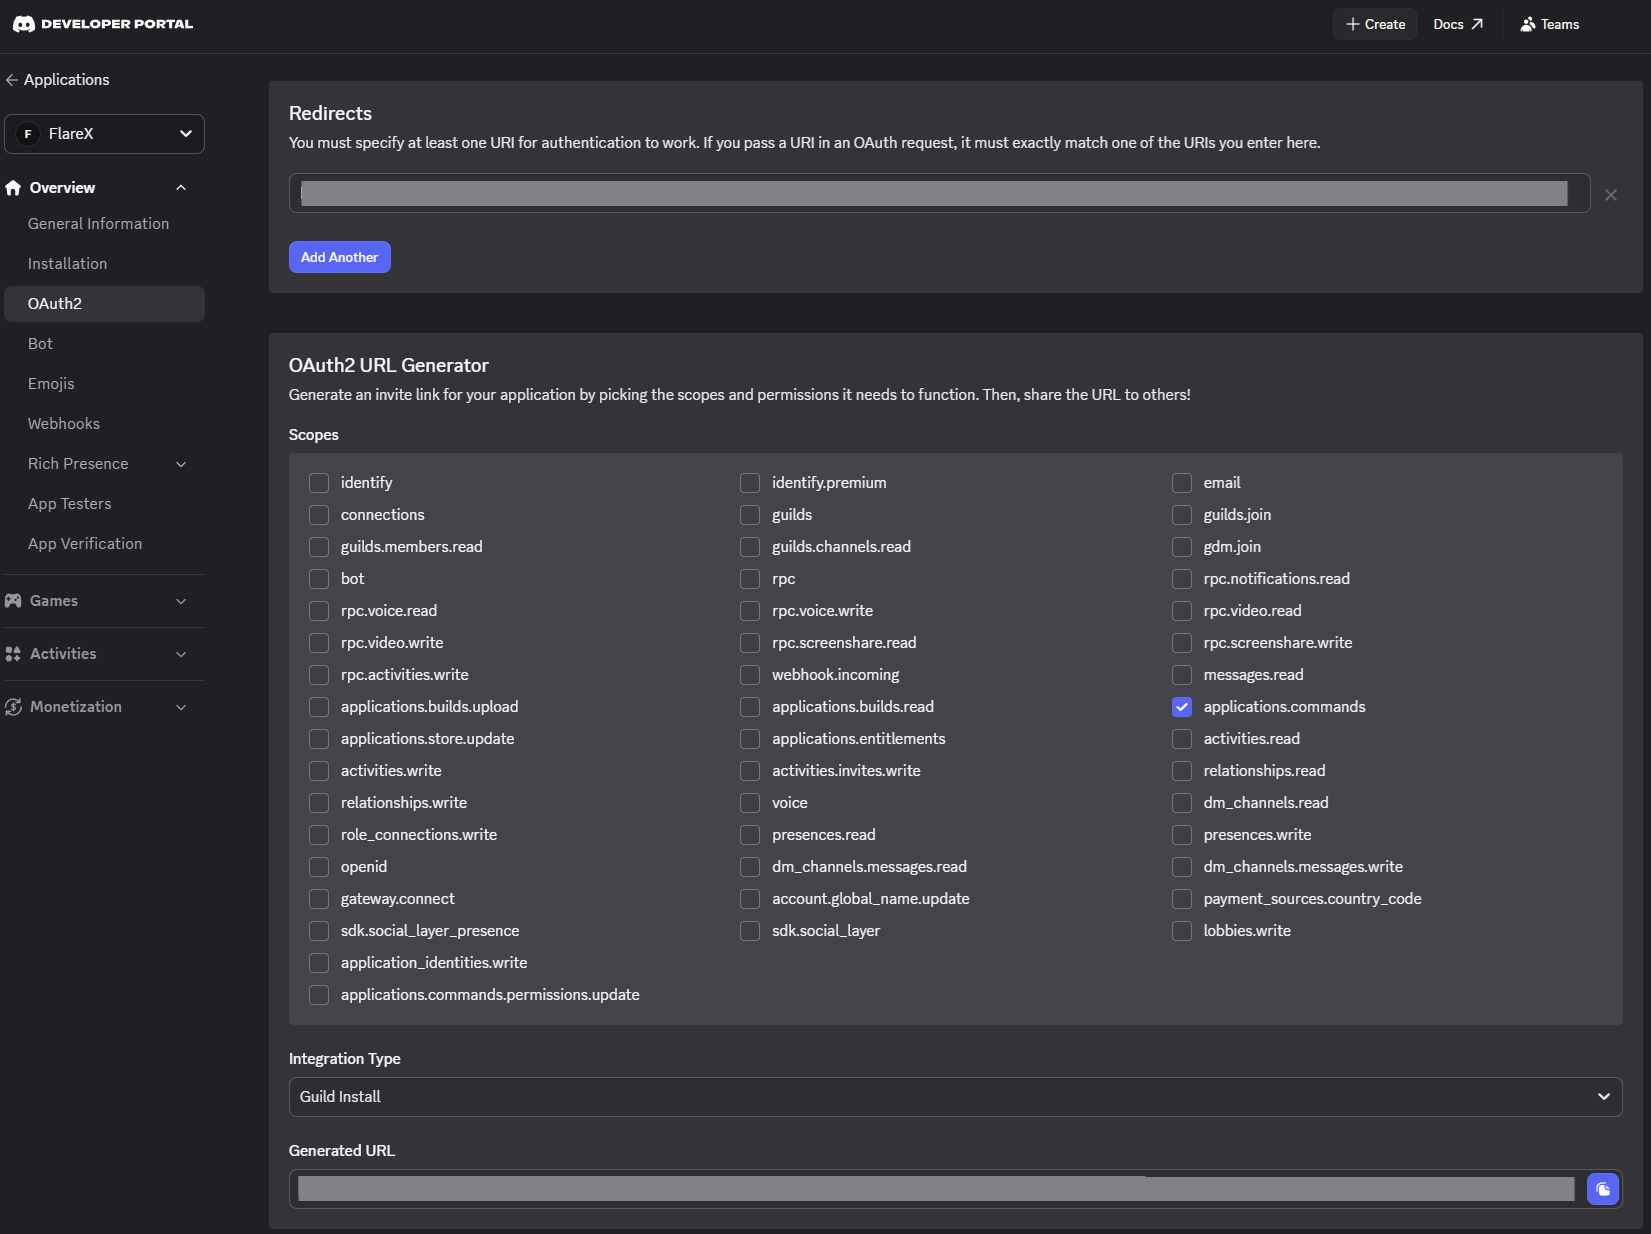
Click OAuth2 in the sidebar, then URL Generator.
Under Scopes, check:
bot— required for any botapplications.commands— required if your bot uses slash commands (almost always yes)
Under Bot Permissions, pick the minimum your bot needs. Common combinations:
Pick the narrowest set of permissions your bot actually uses. It limits blast radius if the bot is compromised and makes users more willing to invite it.
6. Generate the invite URL
As you check scopes and permissions, the generator builds an invite URL at the bottom of the page. It looks like:
https://discord.com/api/oauth2/authorize?client_id=<YOUR_APP_ID>&permissions=<NUMBER>&scope=bot+applications.commands

Click Copy.
7. Add your bot to a server
Paste the invite URL into your browser. Discord's permission-grant screen opens.
- Select a server. Only servers where you have Manage Server permission will appear.
- Review permissions. Double-check they match what you configured.
- Authorize. Solve the captcha if Discord prompts you.
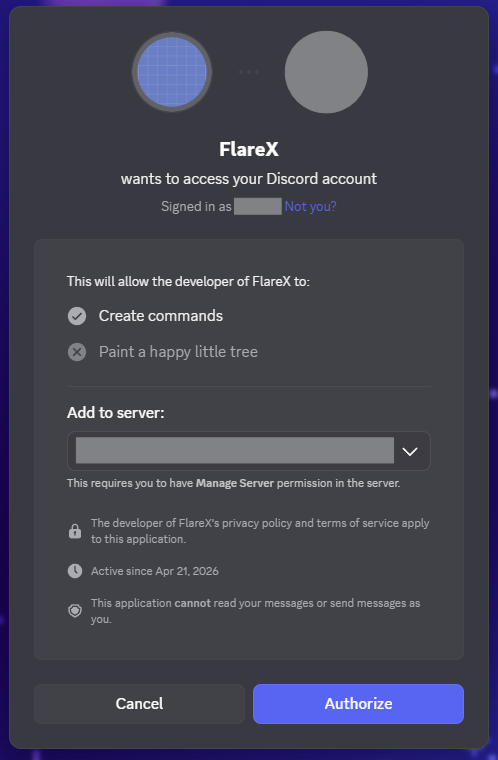
The bot appears in your server's member list, offline. It comes online once you deploy it on FlareX with the token from step 3.
8. Paste the token into FlareX
Back in the FlareX panel, open your bot and go to Secrets. Add:
Key:   DISCORD_BOT_TOKEN
Value: <the token you copied in step 3>
Save, then open Deploy and hit Deploy. The bot connects to Discord's gateway, comes online in your server, and starts receiving events.
Troubleshooting
Bot is online but doesn't respond to messages
Nine times out of ten this is the MESSAGE CONTENT INTENT. Go back to the Bot tab and enable it. Restart the deploy.
Bot is online but doesn't react to member joins
SERVER MEMBERS INTENT is off. Enable it.
"Invalid Token" error in logs
You either:
- Pasted a client secret instead of the bot token (different fields in the portal — the bot token is on the Bot tab, not General Information).
- Reset the token after pasting and the old one stopped working.
- Copied extra whitespace. Re-copy carefully.
Bot appears offline in Discord after deploy
Check your deploy logs in FlareX. Common causes:
- Token missing or mistyped in Secrets.
- Runtime crash immediately on connect — the log usually shows a stack trace.
- Discord gateway rate-limit. Wait 30 seconds and redeploy.
Slash commands don't show up
- Make sure
applications.commandsscope was checked on the invite URL. If not, re-invite (Discord remembers your previous authorization but scope changes require a fresh authorize). - Global commands take up to an hour to propagate. Guild-scoped commands are instant.
"Missing Access" on a specific channel
The bot's role sits below a role that denies permission on that channel. Drag the bot's role higher in the server role list (Server Settings → Roles).
Open a support ticket with your bot ID and the deploy timestamp — we'll look at the logs and point you at the fix.
Quick reference
| Thing | Where in the portal |
|---|---|
| Bot token | Bot → Reset Token |
| Application ID | General Information → Application ID |
| Gateway intents | Bot → Privileged Gateway Intents |
| Invite URL | OAuth2 → URL Generator |
| Slash commands scope | OAuth2 → URL Generator → applications.commands |
| Public vs private bot | Bot → Public Bot toggle |
| Bot icon | Bot → upload |